Why is re-rolling your Medical Wrap so important?
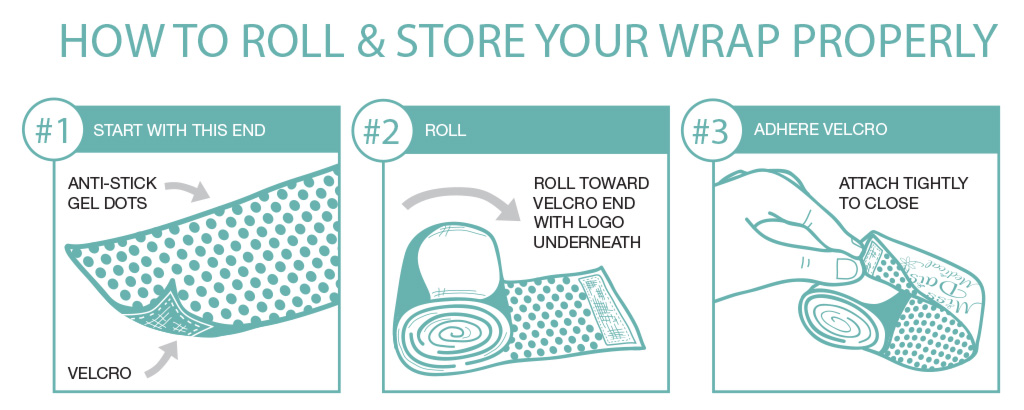
It is important to re-roll your wrap properly because if you don’t then when you re-apply the wrap the Velcro may not end up in the correct position to finish securing the wrap. To re-roll the dressing after each use do this: place dressing on a flat surface with the existing Velcro facing down (on the side closest to you). Begin to wrap by turning the dressing into an upward roll. Roll to the other end where the logo is facing down. Then secure with the existing Velcro.
Medical Bandage Wrapping Methods
Medical wraps can be implemented using a variety of useful and comfortable wrapping methods.
Not all wrapping methods are created equal. That's why we try to help our patient-customers by offering some useful, comfortable and easy ways to apply our antimicrobial medical wraps with the "Uwrap" systems. Check out the illustrations below and don't be afraid to contact us for more information or if you have a suggestion for a new wrap style.
u wrap ™
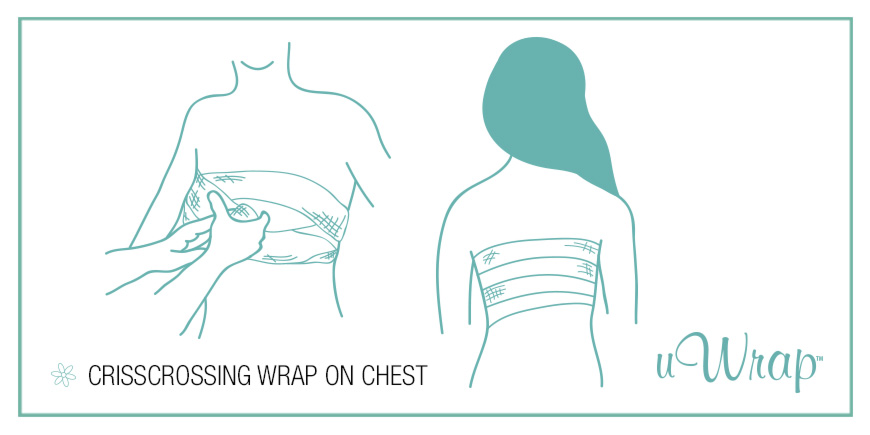
This method can be used on a forearm, a leg, chest or abdomen.
The largest dressing (5") should be used for the chest, the abdomen and ones leg. For a forearm the (3") dressing should be used. Below is how to perform a chest wrap.
- First, make one complete revolution around the chest, just below the breast.
- Next take the dressing upwards to just above the above the breast on the left side of the body and under the arm pit. The dressing goes straight across the back.
- Next bring the dressing under the right arm pit and across the right breast ending just above the first circular revolution. Then continue straight across the back.
- Repeat this process until the entire breast has been covered.
- Secure the dressing with the existing Velcro. The dressing when wrapped in this method around the chest & abdomen, will not tighten with each breath. It can be worn tightly if necessary and is much more comfortable than the circular method.
To reroll the dressing after each use do this: place dressing on a flat surface with the existing Velcro facing down (on the side closest to you). Begin to wrap by turning the dressing into an upward roll. Roll to the other end and secure with the existing Velcro.
Nurse Testimonial
One night, in the middle of the night a nurse woke up to excruciating chest pain. She was only a few days post operative from her bilateral mastectomy and found the dressing to be very uncomfortable. With each successive breath the dressings got tighter and tighter. Her surgeon warned her that this would happen. She told her that at that point she’d need to remove the dressing and then reapply it. She had to wear the dressing 24/7 to avoid complications. On this particular night it was pain caused her to wake up. She knew that she’d need to go into the bathroom to remove and then reapply the dressing in the circular method. She was very groggy as she entered the bathroom and she kept the lights on dim. Once finished she returned to bed and sleep. In the morning she woke up but she was pleasantly surprised that she didn’t have chest pain. She decided that she still needed to take the dressing off, look at the surgical site and if all was well, she’d reapply the dressing. What she noticed shocked her. She realized that in the middle of the night she had rewrapped the dressing in a method that was foreign to her. She realized quickly that she had never seen a dressing wrapped this way. She memorized the way it was wrapped as she as she slowly removed the dressing. She decided to reapply it the same way. Over the next couple of days she wore the dressing in the same manner. She found that she was being compressed much tighter but the dressing didn’t get tighter and tighter as she breathed.
She eventually named the method uWrap, indicating that anyone could wrap in the same method if they had chest surgery. Her surgeon eventually used the same method on her patients and she found the method to be very successful in preventing post operative complications. The uWrap is pictured here on Kim's daughter and it criss crosses in The front of the chest and then goes straight across the back.
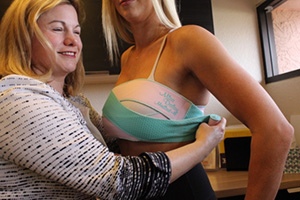
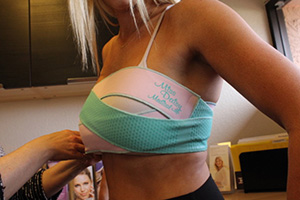
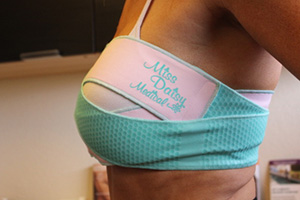
FIGURE 8 WRAP
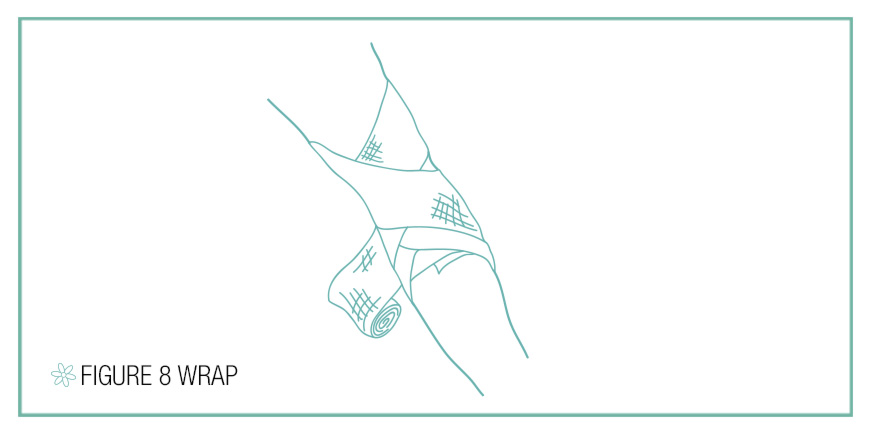
Applying A Figure 8 Wrap
A figure-eight wrap is used to limit joint movement of the hand, elbow, knee, ankle, or foot.
- Apply padding (usually gauze applied between the fingers or toes, around bony areas, and/or in hollow areas).
- Apply an anchor wrap below the joint
- Bring the roll of the wrap up diagonally and across the joint.
- Wrap the roller around the limb above the joint (circular wrap).
- Bring the roller down across the joint diagonally so that it crosses the upward portion of the figure-eight wrap.
- Take the roll behind the body part and up diagonally across the joint again. Overlap two-thirds of the previous upward wrap
- Take the roll behind the body part and down again diagonally, overlapping the previous downward wrap.
- Continue alternate upward and downward diagonal wraps until the joint is sufficiently supported.
To reroll the dressing after each use do this: place dressing on a flat surface with the existing Velcro facing down (on the side closest to you). Begin to wrap by turning the dressing into an upward roll. Roll to the other end and secure with the existing Velcro.
Circular WRAP
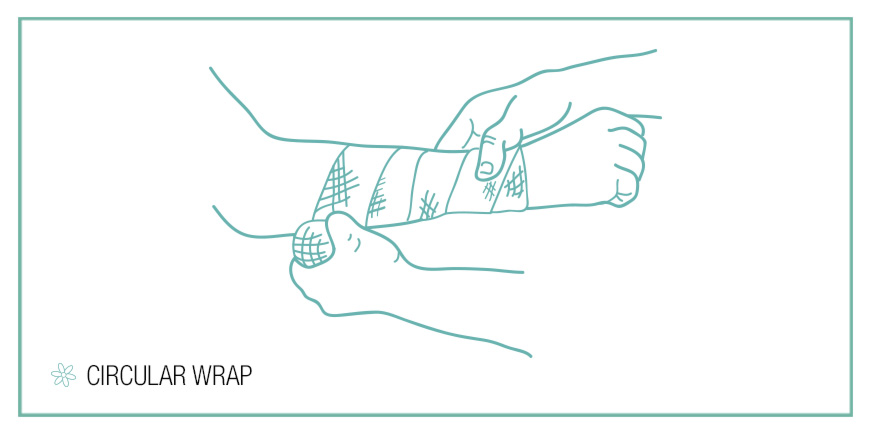
Applying A Circular Wrap
The circular wrap is normally used to apply pressure to a limb. It is especially useful when applying pressure to the calf (lower leg) since it follows the contours of the limb more closely than the spiral wrap.
- Secure wrap with an anchor wrap
- Apply about four spiral turns
- Place the thumb of your free hand on the upper edge of the uppermost turn and apply firm pressure to hold the wrap in place.
- Unwind several inches of wrap from the roll.
- Give the roll a half-twist so the wrap is directed downward. The upper edge of the turn should be parallel to the lower edge of the previous turn and overlap it by two-thirds of its width. The wrap continues in the same direction.
- Carry the roll around the limb and back. The wrap should be at about the same location as the half-twist, but higher.
To reroll the dressing after each use do this: place dressing on a flat surface with the existing Velcro facing down (on the side closest to you). Begin to wrap by turning the dressing into an upward roll. Roll to the other end and secure with the existing Velcro.
